cheetahソフトウェアのチャンネル設定はコンフィグファイルにテキストで記述されています。画面にプロットするチャンネルを変更する場合は、このテキストファイルを変更する必要があります。
コンフィグファイルはデフォルト設定のままインストールされた場合は、以下のフォルダに入っています。
C:\Program Files\Neuralynx\Cheetah5\Configuration
cheetahを初めて起動するときに読み込まれるのは「Cheetah.cfg」というコンフィグファイルです。
中身は以下のようなテキストファイルになっています。
| # Cheetah.cfg # Updated with v5.7.0 of Cheetah # This is a generic configuration file for the Neuralynx, Inc. Cheetah data acquisition system # Edit this file to make the necessary changes. # The '#' is the symbol for a comment, ie. the line following the '#' mark is ignored... # ######### BASIC SOFTWARE SETUP -SetDataDirectory "E:\CheetahData" #System Status Dialog Setup -SetDialogPosition Status 2 572 -SetDialogVisible Status True -SetSystemStatusShowDetails True #Properties Display Setup -SetDialogPosition Properties 598 387 -SetDialogVisible Properties True ######### ACQUISITION SYSTEM SETUP # Do the basic setup for your acquisition hardware - uncomment one only! -ProcessConfigurationFile DigitalLynxSX.cfg #-ProcessConfigurationFile DigitalLynx.cfg #-ProcessConfigurationFile Cheetah64.cfg #-ProcessConfigurationFile RawDataFilePlayback.cfg |
(中略)
| ### 128 channel configurations #-ProcessConfigurationFile 128CSC.cfg #-ProcessConfigurationFile 32TT.cfg #-ProcessConfigurationFile 32TT_CSC.cfg ### 256 channel configurations #-ProcessConfigurationFile 256CSC.cfg ### Special Headstage Configurations #-ProcessConfigurationFile HS-16-MUX_16CSC.cfg #-ProcessConfigurationFile HS-16-MUX_4TT.cfg -ProcessConfigurationFile HS-16-MUX_4TT_CSC.cfg #-ProcessConfigurationFile 12tt_HS-54.cfg #-ProcessConfigurationFile 48csc_HS-54.cfg |
行頭に#マークがついているのはコメントアウトされている行です。コメントアウトされている行は機能していません。
以下の行はコメントアウトされていないので有効になっていることが分かります。ここから別のコンフィグファイルの「HS-16-MUX_4TT_CSC.cfg」を読み込んでいます。
-ProcessConfigurationFile HS-16-MUX_4TT_CSC.cfg
中身を確認するために
C:\Program Files\Neuralynx\Cheetah5\Configuration
フォルダ内の HS-16-MUX_4TT_CSC.cfg を開きます。
| ######## VARIABLE SUBSTITUTION SETUP %subSystemName = AcqSystem1 ######## offset = Number of AD Channels skipped to get to DLSX-M Connections. %offset = 0 ######## Do not alter the following code ######## EIB Channel Number (1 Based) = Headstage Channel Number (0 Based) %channel1 = 16 %channel2 = 0 %channel3 = 1 %channel4 = 2 %channel5 = 3 %channel6 = 4 %channel7 = 5 %channel8 = 6 %channel9 = 27 %channel10 = 26 %channel11 = 25 %channel12 = 24 %channel13 = 23 %channel14 = 22 %channel15 = 21 %channel16 = 20 |
EIBヘッドステージに合わせてチャンネルが変数(%channel)に代入されているのが分かります。
| ######## CSC ACQUISITION ENTITY CREATION %acqEntName = "CSC1" %currentADChannel = %channel1 -CreateCscAcqEnt %acqEntName %subSystemName -SetChannelNumber %acqEntName %currentADChannel %acqEntName = "CSC2" %currentADChannel = %channel4 -CreateCscAcqEnt %acqEntName %subSystemName -SetChannelNumber %acqEntName %currentADChannel %acqEntName = "CSC3" %currentADChannel = %channel8 -CreateCscAcqEnt %acqEntName %subSystemName -SetChannelNumber %acqEntName %currentADChannel %acqEntName = "CSC4" %currentADChannel = %channel12 -CreateCscAcqEnt %acqEntName %subSystemName -SetChannelNumber %acqEntName %currentADChannel |
連続記録用のチャンネルはCSC ACQUISITIONと呼びます。4つのCSCの設定が記述されていることが分かります。
%currentADChannel = %channel1
ここの記述を変更することでチャンネルを変更することができます。変数%channel1には先ほど16が代入されていましたので、CSC1で表示されるのはチャンネル16に設定されています。
これをチャンネル5に変更したい場合は、
%currentADChannel = %channel7
と記述します。
| ######## SPIKE ACQUISITION ENTITY CREATION %acqEntName = "TT1" %currentADSubchannel0 = %channel1 %currentADSubchannel1 = %channel2 %currentADSubchannel2 = %channel3 %currentADSubchannel3 = %channel4 -CreateSpikeAcqEnt %acqEntName %subSystemName 4 -SetChannelNumber %acqEntName %currentADSubchannel0 %currentADSubchannel1 %currentADSubchannel2 %currentADSubchannel3 %acqEntName = "TT2" %currentADSubchannel0 = %channel5 %currentADSubchannel1 = %channel6 %currentADSubchannel2 = %channel7 %currentADSubchannel3 = %channel8 -CreateSpikeAcqEnt %acqEntName %subSystemName 4 -SetChannelNumber %acqEntName %currentADSubchannel0 %currentADSubchannel1 %currentADSubchannel2 %currentADSubchannel3 %acqEntName = "TT3" %currentADSubchannel0 = %channel9 %currentADSubchannel1 = %channel10 %currentADSubchannel2 = %channel11 %currentADSubchannel3 = %channel12 -CreateSpikeAcqEnt %acqEntName %subSystemName 4 -SetChannelNumber %acqEntName %currentADSubchannel0 %currentADSubchannel1 %currentADSubchannel2 %currentADSubchannel3 %acqEntName = "TT4" %currentADSubchannel0 = %channel13 %currentADSubchannel1 = %channel14 %currentADSubchannel2 = %channel15 %currentADSubchannel3 = %channel16 -CreateSpikeAcqEnt %acqEntName %subSystemName 4 -SetChannelNumber %acqEntName %currentADSubchannel0 %currentADSubchannel1 %currentADSubchannel2 %currentADSubchannel3 |
スパイク記録用のチャンネルはSPIKE ACQUISITIONと呼びます。4つのTTの設定が記述されていることが分かります。
%currentADSubchannel0 = %channel1
%currentADSubchannel1 = %channel2
%currentADSubchannel2 = %channel3
%currentADSubchannel3 = %channel4
ここの記述を変更することでチャンネルを変更することができます。変数%channel1~4にはそれぞれ16、0、1、2が代入されていましたので、TT1で表示されるのはチャンネル16、0、1、2に設定されています。
これをチャンネル1、2、3、4に変更したい場合は、
%currentADSubchannel0 = %channel3
%currentADSubchannel1 = %channel4
%currentADSubchannel2 = %channel5
%currentADSubchannel3 = %channel6
と記述します。
記述を変更したコンフィグファイルは名前を変えて保存することをお勧めします。
名前を変えたコンフィグファイルが cheetah.cfg から読み込むよう記述を修正することも忘れないでください。
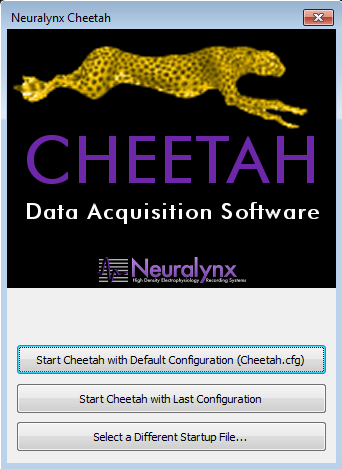
なおコンフィグファイルを書き換えた場合は、cheetahソフトウェアを再起動させ、次にcheetahを起動するときは「Start Cheetah with Default Configuration (Cheetah.cfg)」を選択して、書き換えたコンフィグファイルを読み込ませてください。